CyberKeeda In Social Media

Most used AWS S3 Bucket Policies.


Bucket Policies are one of the key element when we have talk about security and compliance while using AWS S3 buckets to host our static contents.

In this post, below are the some code snippets of most used bucket policy documents.


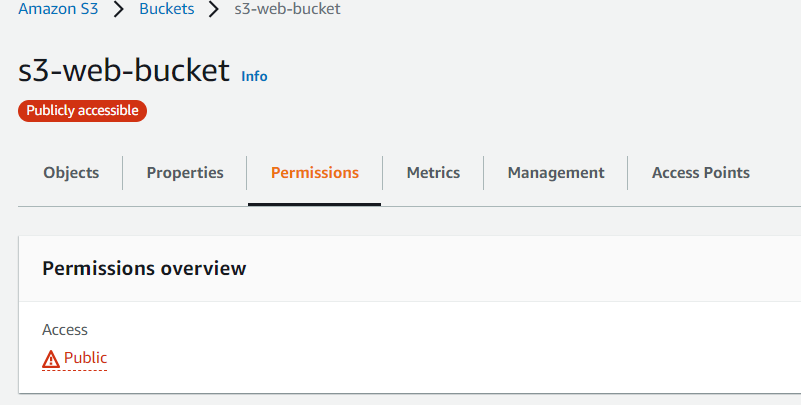
Policy 1 : Enable Public Read access to Bucket objects.

Turing OFF the Public Access Check from S3 bucket permission tab is not sufficient to enable public read access, additionally you need to add below bucket policy statement to enable.


{
  "Version":"2012-10-17",
  "Statement":[
    {
      "Sid":"EnablePublicRead",
      "Effect":"Allow",
      "Principal": "*",
      "Action":["s3:GetObject"],
      "Resource":["arn:aws:s3:::ck-public-demo-bucket/*"]
    }
  ]
}


Policy 2 : Allow only HTTPs Connections.

AWS S3 allows both HTTP and HTTPS by default, in order to force clients to initiate only HTTPS connection, use below bucket policy document to force it.

{
  "Id": "ExamplePolicy",
  "Version": "2012-10-17",
  "Statement": [
    {
      "Sid": "AllowOnlySSLRequests",
      "Action": "s3:GetObject",
      "Effect": "Allow",
      "Resource": [
        "arn:aws:s3:::ck-public-demo-bucket/*"
      ],
      "Condition": {
        "Bool": {
          "aws:SecureTransport": "true"
        }
      },
      "Principal": "*"
    }
  ]
}


Policy 3 : Allow access from a specific or range of IP address.


{
  "Version": "2012-10-17",
  "Id": "AllowOnlyIpS3Policy",
  "Statement": [
    {
      "Sid": "AllowOnlyIp",
"Effect": "Deny", "Principal": "*", "Action": "s3:*", "Resource": [ "arn:aws:s3:::ck-public-demo-bucket", "arn:aws:s3:::ck-public-demo-bucket/*" ], "Condition": { "NotIpAddress": {"aws:SourceIp": "12.345.67.89/32"} } } ] }

Policy 4 : Cross Account Bucket access Policy.


{
    "Version": "2012-10-17",
    "Statement": [
        {
            "Effect": "Allow",
            "Principal": {
                "AWS": "arn:aws:iam::REPLACE-WITH-YOUR-AWS-CROSS-ACCOUNT-NUMBER:root"
            },
            "Action": [
                "s3:GetObject",
                "s3:PutObject",
                "s3:PutObjectAcl"
            ],
            "Resource": [
                "arn:aws:s3:::ck-public-demo-bucket/*"
            ]
        }
    ]
}

Note :  Do copy content from cross account with additional acl as bucket owner full control

aws s3 cp demo-file.txt s3://ck-public-demo-bucket/ --acl bucket-owner-full-control

Will keep on adding more..
Read more ...

How to install Ansible on Ubuntu using Docker and Docker Compose

 I was quite familiar with Ansible and has good worked on automating task using it, although I was not familiar with Ansible tower, have witnessed it dashboard some time but never worked directly with it.

Now, during my current I got a task of creating a automation using service now ticket.

This some how introduced me to Ansible API, Ansible Tower Webhooks and much more, during my exploration of Ansible tower and it's component I was somehow limited up to certain access, this insisted me to install Ansible AWX an Opensource version of Ansible Tower and I would again like to thank Redhat, for keeping an opensource version of it.


The official release now doesn't support docker installation, instead they provide kubernetes installation guide, which for me personally is more hectic when it comes to testing and development.


Here is the guide, I followed to install Ansible AWX on Ubuntu.


External Link 


Don't forget to Thanks the author !

Read more ...

IPV4 - Classes Range - Pictorial Representation


BOGON IPs - Please note Bogon IPs are reserved for private network, thus can't be used by ISP providers to use the ranges to declare it as Public IP.

Class A Bogon IP range.
  • CIDR - 10.0.0.0/8
  • Total IP - 32-8 = 24 
    • 2^24 = 16777216
Class B Bogon IP range.
  • CIDR - 172.16.0.0/12
  • Total IP - 32-12 = 20 
    • 2^20 = 1048576
Class C Bogon IP range.
  • CIDR - 192.168.0.0/16
  • Total IP - 32-16 = 16
    • 2^16 = 65536

Read more ...

Find IP Address Information Cheat Sheet by Example.


Read more ...

How to scan IP addresses details on your network using NMAP


You know using Linux is a kind fun, think about a requirement and you can see a wide number opensource tools gives you wings to your idea, no hurdles just go with your goal, they all will support you..

I would like to share you, what made me search internet and write this blog post.

So within my Lab environment, it's a very frequent task to configure, update IP configuration of other virtual machines, so to tackle this task, I have already written an Ansible Role, which basically configures the IP address for the host which has existing dhcp address assigned to it.

Now still there are some information I need to provide ansible before I proceed to run the playbook and the information it needs is, I need to manually look for free IPs in my current network.

So I was curious how to scan my network for used and free IP addresses, thus I surfed the internet and found, my friendly network troubleshooting tool NMAP gives the insight about it.

Let's see what command can be used to find those details.

Using below one lines to search for used IPs within your network.

$ nmap -sP 192.168.29.0/24

Output


Starting Nmap 6.40 ( http://nmap.org ) at 2022-06-16 17:10 IST
Nmap scan report for 192.168.29.1
Host is up (0.0078s latency).
Nmap scan report for 192.168.29.9
Host is up (0.0050s latency).
Nmap scan report for 192.168.29.21
Host is up (0.0043s latency).
Nmap scan report for 192.168.29.30
Host is up (0.0015s latency).
Nmap done: 256 IP addresses (4 hosts up) scanned in 2.59 seconds

Now let's scan again the same network and look for the listening ports along with the host ip

$ sudo nmap -sT 192.168.29.0/24

Output

Starting Nmap 6.40 ( http://nmap.org ) at 2022-06-16 17:17 IST
Nmap scan report for 192.168.29.1
Host is up (0.0061s latency).
Not shown: 992 filtered ports
PORT     STATE  SERVICE
80/tcp   open   http
443/tcp  open   https
1900/tcp open   upnp
2869/tcp closed icslap
7443/tcp open   oracleas-https
8080/tcp open   http-proxy
8200/tcp closed trivnet1
8443/tcp open   https-alt
MAC Address: AA:HA:IC:PF:P3:C1 (Unknown)

Nmap scan report for 192.168.29.9
Host is up (0.0083s latency).
Not shown: 998 closed ports
PORT    STATE SERVICE
80/tcp  open  http
554/tcp open  rtsp
MAC Address: 14:07:o8:g5:7E:99 (Private)

Nmap scan report for 192.168.29.21
Host is up (0.0051s latency).
Not shown: 998 closed ports
PORT   STATE SERVICE
22/tcp open  ssh
80/tcp open  http
MAC Address: 08:76:20:00:75:D5 (Cadmus Computer Systems)

Nmap scan report for 192.168.29.25
Host is up (0.0057s latency).
Not shown: 999 filtered ports
PORT    STATE SERVICE
135/tcp open  msrpc
MAC Address: F0:76:30:60:8E:21 (Unknown)

Nmap scan report for 192.168.29.30
Host is up (0.0018s latency).
Not shown: 997 closed ports
PORT     STATE SERVICE
22/tcp   open  ssh
8000/tcp open  http-alt
8080/tcp open  http-proxy

Nmap done: 256 IP addresses (5 hosts up) scanned in 7.84 seconds

If you need additional details like Host OS details and some more, then run the scan again with below command

$ sudo nmap -sT -O 192.168.29.0/24

Output

Nmap scan report for 192.168.29.30
Host is up (0.00026s latency).
Not shown: 997 closed ports
PORT     STATE SERVICE
22/tcp   open  ssh
8000/tcp open  http-alt
8080/tcp open  http-proxy
Device type: general purpose
Running: Linux 3.X
OS CPE: cpe:/o:linux:linux_kernel:3
OS details: Linux 3.7 - 3.9
Network Distance: 0 hops

Hope this post will help you in some sort !
Read more ...

How to remove last character from the last line of a file using SED


This could be very relatable hack for you as we all are dealing with JSON object now a days, and during automation using bash aka shell scripts, we may need to parse our json data.

Okay so here is the data, and what I have

$ cat account_address.txt

"59598532c58EBeB13A70a37159F0C3AB2e0aB623": { "balance": "10000" },
"A281753296De2A35c2Ae6D613b317b71F76F6aE2": { "balance": "10000" },
"2eAc363b2ffAfbc9b5dE9E2004057a778313d4Ac": { "balance": "10000" },
"3FD7893E53D35A93A240Be3B4112A24746F8d858": { "balance": "10000" },
"dfd46B5F7B194133C48562d84A970358E13d64f7": { "balance": "10000" },
"8F3D701F3963d41935C4D2FeeFb3E072FBc613Ee": { "balance": "10000" },
And  here is the data, and what I need.
$ cat account_address.txt

"59598532c58EBeB13A70a37159F0C3AB2e0aB623": { "balance": "10000" },
"A281753296De2A35c2Ae6D613b317b71F76F6aE2": { "balance": "10000" },
"2eAc363b2ffAfbc9b5dE9E2004057a778313d4Ac": { "balance": "10000" },
"3FD7893E53D35A93A240Be3B4112A24746F8d858": { "balance": "10000" },
"dfd46B5F7B194133C48562d84A970358E13d64f7": { "balance": "10000" },
"8F3D701F3963d41935C4D2FeeFb3E072FBc613Ee": { "balance": "10000" }

Using SED one liner, we can do this stuff.

$ cat account_address.txt | sed '$ s/.$//'


That's it !

Read more ...

How to restrict AWS S3 Content to be accessed by CloudFront distribution only.


CloudFront is one of the popular services of AWS that gives Caching mechanism for our static contents like html, css, images and media files serving a very fast performance using it's globally available CDN networks of POP sites.

In this blog post, we will know 

  • How to create a basic CloudFront distribution using S3 as Origin.
  • How can we create a CloudFront distribution using S3 as Origin without making the Content of Origin(s3 Objects) public.
  • What, Why and How about CloudFront OIA.


Here in this scenario, we will be using S3 bucket as an Origin for our CloudFront distribution


We will understand the problem first and then know, how Origin Access Identity can be used to address the request.

So we have quickly created a S3 bucket and CloudFront distribution using default settings with below details.

  • S3 bucket name - s3-web-bucket
  • Bucket Permissions - Block all Public Access
  • CloudFront distribution default object - index.html
  • CloudFront Origin - s3-web-bucket

Now, quickly upload a index.html file under the root of s3 bucket as s3-web-bucket/index.html.

We are done with the configuration, let's try to quickly access the CloudFront distribution and verify if everything is working perfectly or not.

$ curl -I https://d2wakmcndjowxj.cloudfront.net

HTTP/2 403
content-type: application/xml
date: Thu, 14 Jul 2022 07:28:37 GMT
server: AmazonS3
x-cache: Error from cloudfront
via: 1.1 ba846255b240e8319a67d7e11dc11506.cloudfront.net (CloudFront)
x-amz-cf-pop: MRS52-P4
x-amz-cf-id: BbAsVxxWfW9v3m1PD2uBHqRIj_7-J5U3fUzhhFiQQhbJj8a7lQlCvw==
We encountered 403 error, why ?
Ans : This is expected as we have kept the bucket permission level as Block All Public Access.

Okay, then let's modify the bucket permission and Allow Public Access, for this follow the below two steps.

  • Enable Public Access from Console by unchecking the Check box "Block all public access" and Save it.

  • Append the below Bucket Policy JSON statement to make all objects inside the Bucket as Public, the one highlighted in red can be replaced by your own Bucket name.

{
    "Version": "2012-10-17",
    "Statement": [
        {
            "Sid": "AddPerm",
            "Effect": "Allow",
            "Principal": "*",
            "Action": "s3:GetObject",
            "Resource": "arn:aws:s3:::s3-web-bucket/*"
        }
    ]
}

  • Save it, and your bucket permission section will appear with Red Amber signifying that your bucket is publicly accessible.

Done, Now let's try again to access the Website (index.html) from our CloudFront distribution.

$ curl -I https://d2wakmcndjowxj.cloudfront.net

HTTP/2 200
content-type: text/html
content-length: 557
date: Thu, 14 Jul 2022 07:47:58 GMT
last-modified: Wed, 13 Jul 2022 18:50:58 GMT
etag: "c255abee97060a02ae7b79db49ed7ec1"
accept-ranges: bytes
server: AmazonS3
x-cache: Miss from cloudfront
via: 1.1 ba055a10d278614dad75399031edff3c.cloudfront.net (CloudFront)
x-amz-cf-pop: MRS52-C2
x-amz-cf-id: Bhf_5IjA0sifp7jON4dpzZdjpCZCQTF5L7c5oenUbjc1vZzvL6ZUWA==

Good, we are able to access our webpage and now our static contents will be served from CDN network, but wait let's try to access the object(index.html) from bucket's S3 URLs too.

$ curl -I https://s3-web-bucket.s3.amazonaws.com/index.html

HTTP/1.1 200 OK
x-amz-id-2: OgLcIIYScHdVok2puZb09ccCjU5K9xNxOL6D1sVj/nBf6hm93vCjQQSpm3fxo4tXpdjUa3u2TS0=
x-amz-request-id: 588WXNR2BH9F37R9
Date: Thu, 14 Jul 2022 07:50:42 GMT
Last-Modified: Wed, 13 Jul 2022 18:50:58 GMT
ETag: "c255abee97060a02ae7b79db49ed7ec1"
Accept-Ranges: bytes
Content-Type: text/html
Server: AmazonS3
Content-Length: 557

Here is the loophole, naming standards for any s3 bucket urls and it's respective objects are quite easy to guess if one knows the name of the bucket only.

User, developer and hackers can bypass the CloudFront url and can get access to Objects directly from S3 Urls only, but you may think or what's the issue as they are anyhow public read in nature by permissions.

So to answer these questions, here are some points I would like to point, how accessing content via CloudFront URls is useful

  • CloudFront URLs give you better performance.
  • CloudFront URL can provide Authentication mechanism.
  • CloudFront URL gives additional possibilities to trigger CloudFront Function, which can be used for custom solutions.
  • Sometimes content of a website/API is designed to be served via CloudFront only, accessing it from S3 gives you a portion of it's content.
These are few counter points, but there are many more to support why should you disable public access to your s3 buckets.

Read more ...

CloudFront : How to host multiple buckets from single CloudFront domain


As far if you follow this blog's posts, here mostly posts are related to cloud tasks assigned to me as an requirement, you can think as one of the industry standard requirements too.

In this blog post, we will see how we can achieve the above scenario that is One CloudFront domain to host multiple S3 buckets as origin.

Let's follow the steps as follow.

Create 3 different S3 buckets as per above architecture diagram.


As per the architecture diagram, create respective directories to match the URI path that is

  • http://d233xxyxzzz.cloudfront.net/web1 --> s3-web1-bucket --> Create web1 directory inside s3-web1-bucket/
  • htttp://d233xxyxzzz.cloudfront.net/web2 --> s3-web2-bucket --> Create web2 directory inside s3-web2-bucket/

Dump 3 individual index.html files, that resembles to be an identifier as content served from that specific bucket.

  • index.html path for s3-web-bucket -- s3-web-bucket/index.html
  • index.html path for s3-web1-bucket -- s3-web-bucket/web1/index.html
  • index.html path for s3-web2-bucket -- s3-web-bucket/web2/index.html

This is how my three different index.html looks like.


We are set from the Bucket part, let's jump to CloudFront and create a basic CloudFront distribution with one of the s3 bucket as origin, here we have chosen s3-web-bucket as our origin for CloudFront distribution with other default settings.


Note : Default root object to index.html, else we have to append index.html manually every time after /

Now here comes the fun, we have our CloudFront URL in active state and thus according to our architecture this is what we are expecting overall.


Create Origins for S3 buckets.

Let's add other two more origin, which are the two other remaining s3 buckets.

Origin Configuration for S3 bucket "s3-web1-bucket"


Origin Configuration for S3 bucket "s3-web2-bucket"


Create Behaviors for the above origins.

So far, we have added all the s3 buckets as origin, now let's create the behavior which is path aka URI based routing.

Behavior 1 - /web1 routes to s3-web1-bucket

Behavior 2 - /web2 routes to s3-web2-bucket

Overall, within the Behavior tab, it should look as below  


That's it !
Let's Open Browser and test the urls one by one.

  • https://d2wakmcndjowxj.cloudfront.net
  • https://d2wakmcndjowxj.cloudfront.net/web1/index.html
  • https://d2wakmcndjowxj.cloudfront.net/web2/index.html
  
Hope this will help you in some sort !
Read more ...

Kubernetes Inter-pod communication within a cluster.


In this post, what are the ways through which we can configure our pods to communicate with each other within the same Kubernetes cluster.

In order to understand the same, we have create a lab scenario where we have two pods running inside the same cluster.


We will focus on two namespace 
  • default
  • web-apps
Let's see what are the pods running in both namespaces.
  • Pods running under default namespace.


  • Pods running under web-apps namespace.


What's the application - So we have our application pod named as "genache-cli-deploymnet" running under default namespace, within this lab environment we will know how we can establish communication between microservices like my-shell and weapp-shell to genache-cli-core.

Here are the different ways..

Using Pod's IP.

Every pod gets an IP from the defined CIDR range, which can be used to communicate directly from each other, irrespective of namespaces.
Thus a simple pattern of http://<pod-ip-address>:<container-port-number>

So as per our lab environment, we will try to establish a connection to genache-cli running with IP Address as curl 10.1.1.160 and on Port 8545

> kubectl get pods -o wide

NAME                                     READY   STATUS    RESTARTS         AGE   IP           NODE             NOMINATED NODE   READINESS GATES
genache-cli-deployment-8f48b88fb-dqnkx   1/1     Running   20 (2d10h ago)   30d   10.1.1.160   docker-desktop   <none>           <none>
my-shell                                 1/1     Running   0                37m   10.1.1.162   docker-desktop   <none>           <none>
Output from my-shell running on web-apps namespace
root@webapp-shell:/# curl http://10.1.1.160:8545/
400 Bad Request 

Output from webapp-shell running on default namespace.

root@my-shell:/# curl http://10.1.1.160:8545/
400 Bad Request

Read more ...

Selenium XPATH Cheat Sheet


XPATH that contains Partial Text.


Example to Consider.

<span class="style-scope ytd-grid-video-renderer">1 day ago</span>

<span class="style-scope ytd-grid-video-renderer">84K views</span>

<span class="style-scope ytd-grid-video-renderer">1 hour ago</span>

<span class="style-scope ytd-grid-video-renderer">8 hour ago</span>


Need to Grep elements with Text that contains partial word as hour

Code Snippet.

 //*[contains(text(), "hour")]

In case if to Grep elements that contains partial tag.

 //*[contains(@id, "title")]


Read more ...
Designed By Jackuna